
10 DIY Car Detailing Tips
Summer road trips are coming up which makes this the perfect time to give your vehicles a thorough cleaning. With the warmer temperature and longer days, many people tend to opt for a DIY clean rather than going to a professional car detailing service. This is a great way to save some money and get your vehicles looking good for the road. While it may seem washing a car is relatively easy, here are some tips and tricks to help you get your car looking its best while also saving you time and energy.
1. Wash from the top and work downward, saving glass for last.
A mistake many people make is to start cleaning where they see the most dirt and grime first. Or to just start cleaning at random. We always recommend working top to bottom regardless of what you are cleaning. This is a tip you will see in several . Take advantage of gravity and prevent doing double work. If you start at the bottom, then dirt and debris that you remove later will re-soil the area you just cleaned and undo all your hard work.
First, pre-wash with clean water. Completely soak the entire car from top-down to remove loose debris and dirt. Use a 5-gallon bucket to mix up a car wash cleaning solution as directed on the label. Gently scrub the vehicle with a soft rag or sponge in small circular motions. Soap up small areas at a time and then rinse clean and repeat. Clean with soap and rinse with clean water panel by panel. Since working top-down, you would start with the roof of the vehicle. Clean the roof with the soapy sponge and then rinse clean. Then clean the hood with soap and rinse clean. Keep working like this, from top to bottom until the entire car has been washed with soap and rinsed cleaned.
You want to use the top down approach inside the car as well. Use a cleaning agent that is especially formulated for your interior car surfaces. Spray the cleaning agent directly on the rag and then wipe down the dash, consoles and other hard surfaces in the vehicle.
2. Use a pressure washer for pre-wash and rinsing cars only.
We highly recommend using a pressure washer for pre-washing with clean water and rinsing after washing with soap. It can save you tons of time by applying a wide angle of clean water to the vehicle and covering a larger area than your garden hose. The pressurized water helps blast away stuck-on dirt, mud and grime from the road. When rinsing away soap, make sure to remove 100% of the soap from the vehicle.
We do not recommend using a pressure washer for applying soap. Soap should be applied deliberately and controlled in small areas at a time to avoid the soap from drying on your vehicle’s exterior surface. Dried soap can cause swirls to be left behind on the paint, and some soaps can even leave a permanent mark.
Don’t own a pressure washer? That’s okay. Rent a Rug Doctor Pro Electric Pressure Washer for 24 hours. Find a rental location near you.
3, Avoid the sun.
As previously discussed, you do not want to risk soap drying on the exterior surface of your car. You also don’t want cleaning products used on interior surfaces to dry before you can wash it off. This could result in streak marks and possible damage. Reduce this risk by arranging to wash your vehicle in the shade or later in the day when the sun is less intense and the temperature is cooler.
4. Keep rags, sponges and towels clean during the wash.
Rinse your soapy sponge between each small area you clean to avoid taking contaminants from one area of the vehicle to the other. So, if working as recommended earlier, you would rinse your soapy sponge clean after finishing the roof and before starting on the hood. Then rinse again after finishing the hood and before starting on the next area. This will save you time and energy. Use separate cleaning rags for interior and exterior areas. Lastly, take care to make sure your drying cloths are clean.
5. Use compressed air to clean hard-to-reach places.
If you have an air compressor, you can use it to clean interior areas that are harder to reach like in-between air vents, small cubby holes, door handles, etc. Blast compressed air in these areas to blow-out dust and remove stuck on debris. Do this before wiping down the interior of the car, or you will be wiping it all down again!
6. Sanitize high touch points.
According to this study, the average steering wheel is six times dirtier than an average cell phone screen, four times dirtier than a public toilet seat, and two times dirtier than public elevator buttons! After wiping down the interior hard surfaces with a detailing cleaning agent, disinfect the steering wheel, radio and console buttons and door handles with a sanitizer to eliminate bacteria and germs.
7. Deep clean car interior and upholstery.
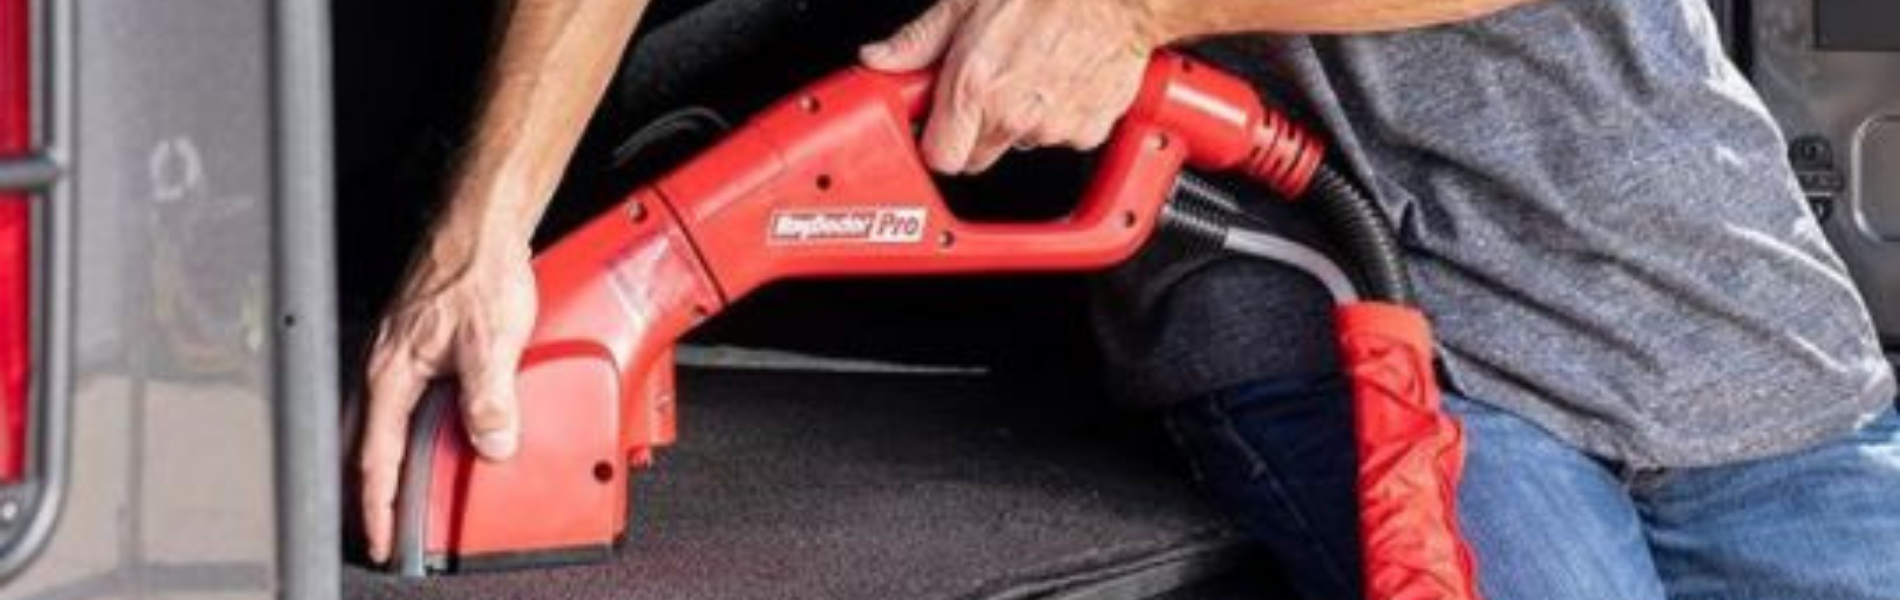
Vacuuming your carpet is great for removing loose debris, but that only provides a surface clean and does little to eliminate spots and stains. A carpet cleaning extractor machine provides a deep clean and removes spots and stains. It will inject a cleaning solution mixture into the carpet to loosen the stain and then uses suction to extract the dirty water into a separate tank and remove the stain and odors. A portable spot cleaner (like this one) is a small, compact carpet cleaning extractor that is great for small areas like car interiors.
Before using the spot cleaner, use a wire brush to gently brush the carpet to release stuck-on or ground-in dirt, mud, food and debris. Then, vacuum the carpet to remove all of the loose fragments. Finish with the portable spot cleaner, following directions as listed on the machine. We recommend pairing the machine with Rug Doctor Spot & Upholstery cleaner.
If your vehicle carpet and upholstery has lots of persistent stains that need a little more attention, we recommend renting Rug Doctor Pro Portable Detailer & Spot Cleaner. This machine has the same suction power as an upright carpet cleaner. It also features a motorized scrubbing brush to help scrub stubborn stains. Find a rental location near you
8. Dry with a clean, soft cloth.
Allowing your vehicle to air dry can result in spots. Natural minerals occurring in water do not evaporate during an air dry. Use a soft cloth or towel to completely dry the vehicle after it is completely rinsed clean.
9. Become an expert at cleaning auto glass.
After drying, it is time to tackle the windows. Firstly, use an automotive glass cleaner and a microfiber towel. Start at the top and work your way down. For door windows, lower the window slightly to clean the top and then roll them up to clean the very bottom. Spray the cleaner directly on the cloth and then wipe the windows in different directions for interior and exterior. For example, interior wipe horizontal and exterior wipe vertical. This way, if there are any streaks, you will immediately know which side needs to be cleaned again based on the direction of the streak. This keeps you from re-cleaning areas that do not need it.
10. Make it easier on yourself next time.
Detailing a vehicle is a time-consuming task. There are some things you can do to maintain the clean, making it easier the next go-round.
- Keep a trash can in the car and empty it every time you stop for gas
- Put a folded paper towel or rag in the bottom of your cup holders to catch loose dirt and food particles.
- Keep upholstery and glass cleaning wipes in your glove box to clean messes immediately.
- Replace carpeted floor mats with rubber mats for easy cleaning.
- Do a weekly de-clutter of your vehicle, removing trash, clothes, toys or whatever else has accumulated throughout the week.
We love to see a good before and after photo! Share your auto detailing results with us on Facebook, Twitter, and Instagram.
